
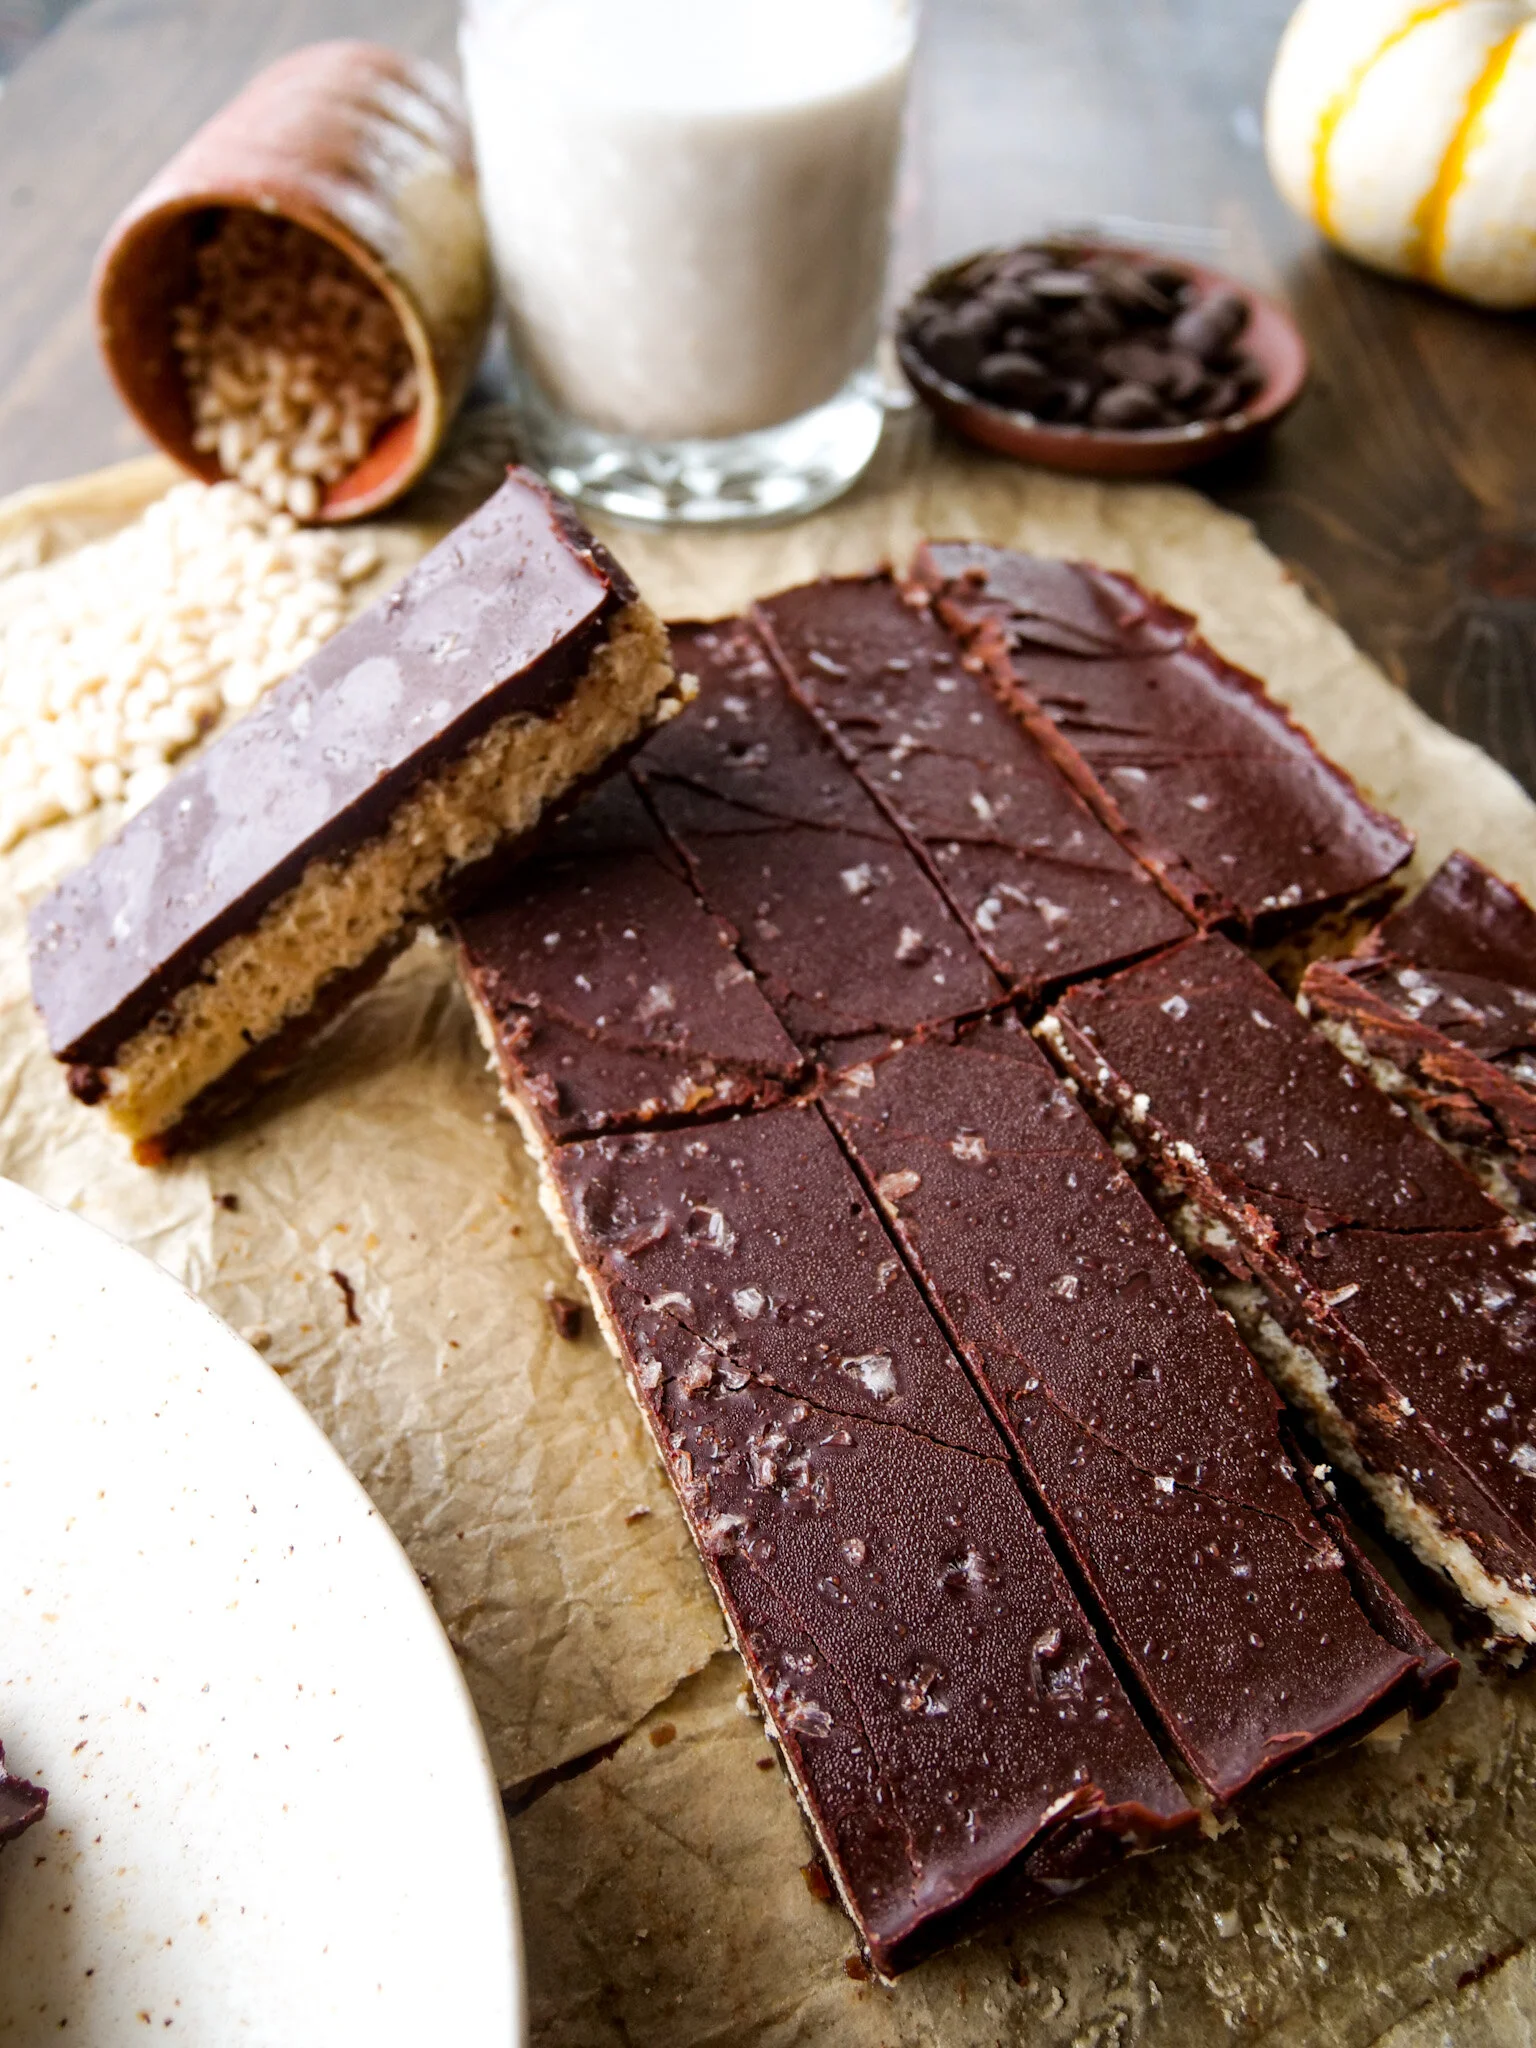
Bai’s 3 Layer Crunch Candies
I am so excited to finally bring this recipe to life! This dessert is something I have had in the back of my mind for quite awhile, but haven’t had the right timing to create it. With the holidays around the corner, I finally had a great reason to whip these up.
Growing up in the 90’s, I had my fair share of rice crispy treats, but I always thought there was something missing. Like a gooey nut butter layer maybe? I tried a few different variations of this concept, but this recipe was definitely the winner by a long shot. These 3 layer crunch candies are so yummy and delicious that it’s hard to believe they are all vegan, gluten free, and refined sugar free!
These treats are super simple and easy to make that it’s a great recipe to get the kids involved in the kitchen. Trust me, these candies are way more healthy compared to the usual conventional candies out there on the market that are packed with 100’s of fillers, oils, and ingredients that I can’t pronounce. So, be sure to keep room for dessert this holiday season, because you won’t want to miss out on a single bite of these tasty treats.
Makes 8-10 crisp candies:
The Goods:
2 cups medjool pitted dates, minced finely or processed in food processor
1 1/2 cup organic brown rice cereal crisps
1/2 cup cashew butter
3/4 cup unsweetened chocolate chips, melted over a double boiler
1 cup coconut sugar
2 tbsp melted coconut oil
1/2 tsp flaky sea salt

The Method:
Take your pitted dates and process them until they are finely chopped, either with a chefs knife or food processor. Then line a 9x9 baking pan with parchment paper, and use a dash of coconut oil to line the bottom of the parchment paper to prevent to dates from sticking too much. Carefully pour the minced dates into the greased parchment paper and flatten it firmly with a rubber spatula until you have your first layer.
Pop it uncovered into the freezer for 5-10 minutes as you create your second layer, the cashew butter and rice crispy layer! Into a large mixing bowl, add your rice cereal and cashew butter. Mix with a spatula, until all the big globs of cashew butter are mixed thoroughly, but try not to crush the rice crisps, you want to keep them as whole as possible.
Pull the baking pan out of the freezer, and carefully pour your second layer over the top of the date layer. Flatten and smooth out any bumps until you have a flat second layer. Again, pop the baking dish uncovered into the freezer as you make your third layer.
In a double boiler, add your chocolate, coconut sugar, and coconut oil. (Double Boiler: two sauce pans stacked, bottom one with water, top one with chocolate, sugar, & oil) Turn on to a medium low heat and melt the chocolate and dissolve the sugar. Be sure to keep stirring constantly to prevent the chocolate from burning. This should take about 7-10 minutes. Once the sugar has dissolved into the melted chocolate, remove from heat.
Quickly take out the baking dish from the freezer. Pour the melted mixture over the top to create your third layer. Instead of smoothing out the chocolate with a spatula, you can pour it in, and then pick up the tray and shake it from side to side to get all the chocolate over the entire dish. Sprinkle flaky sea salt over the top of the chocolate.
Cover with lid, and freeze for 20-30 minutes or until the chocolate has hardened completely. Don’t let it freeze for over 45 minutes otherwise, it will be harder to cut without the chocolate breaking and ruining the shapes of the crisps.
Once the top layer is hard, grab the edges of the parchment paper and pull the whole dish out of the baking dish. Using a large sharp knife, cut into desired sizes. I cut mine into 10 rectangle bars, but you can do larger ones.
After they are cut, you can pop them into a freezer safe dish, and enjoy as a cold frozen snack whenever! Keep in the freezer for 10-14 days. Enjoy!


Thanks so much for checking out our recipes! I hope you find something here that satisfies your cravings or encourages you to try something new. Make sure to check back every week to see our new recipes!
Want more? Check out our YouTube channel!